Empathy Maps
Empathy Maps help the team consider a design problem from the member’s point of view by exploring what a person says, does, thinks, and feels.
Empathy Maps shift the team's perspective—from our own perceptions and goals—to the needs and behaviors of the people we are serving. They position us to share what we each individually know about people’s needs in a practical, collaborative and rearrangeable format that’s good for problem-solving.
You can use Empathy Maps to:
- Create a collaborative medium where the team can build a shared understanding of the member or employee's point of view.
- Articulate specific member tasks, motivations, goals and obstacles instead of relying on opaque demographic labels.
- Account for the needs of the real people we are creating experiences for.
Prerequisites
A team can create an Empathy Map once they have:
- Qualitative data to provide insight into the needs of and challenges facing the member or employee.
- A shared project, activity, or problem to solve.
Template Downloads
This Is What It Looks Like
Let’s Get Started
1 Draw a blank map.
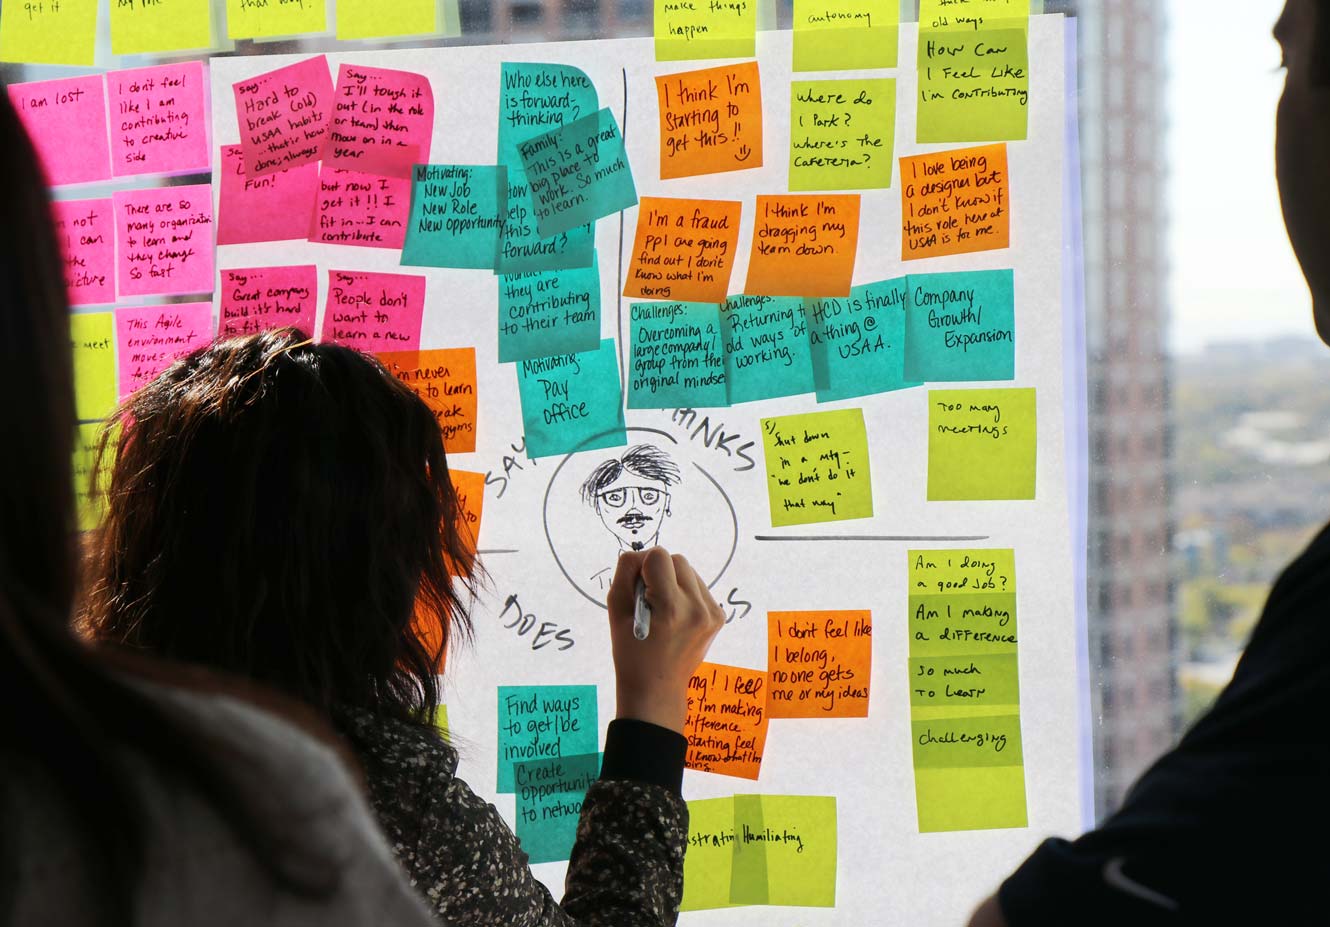
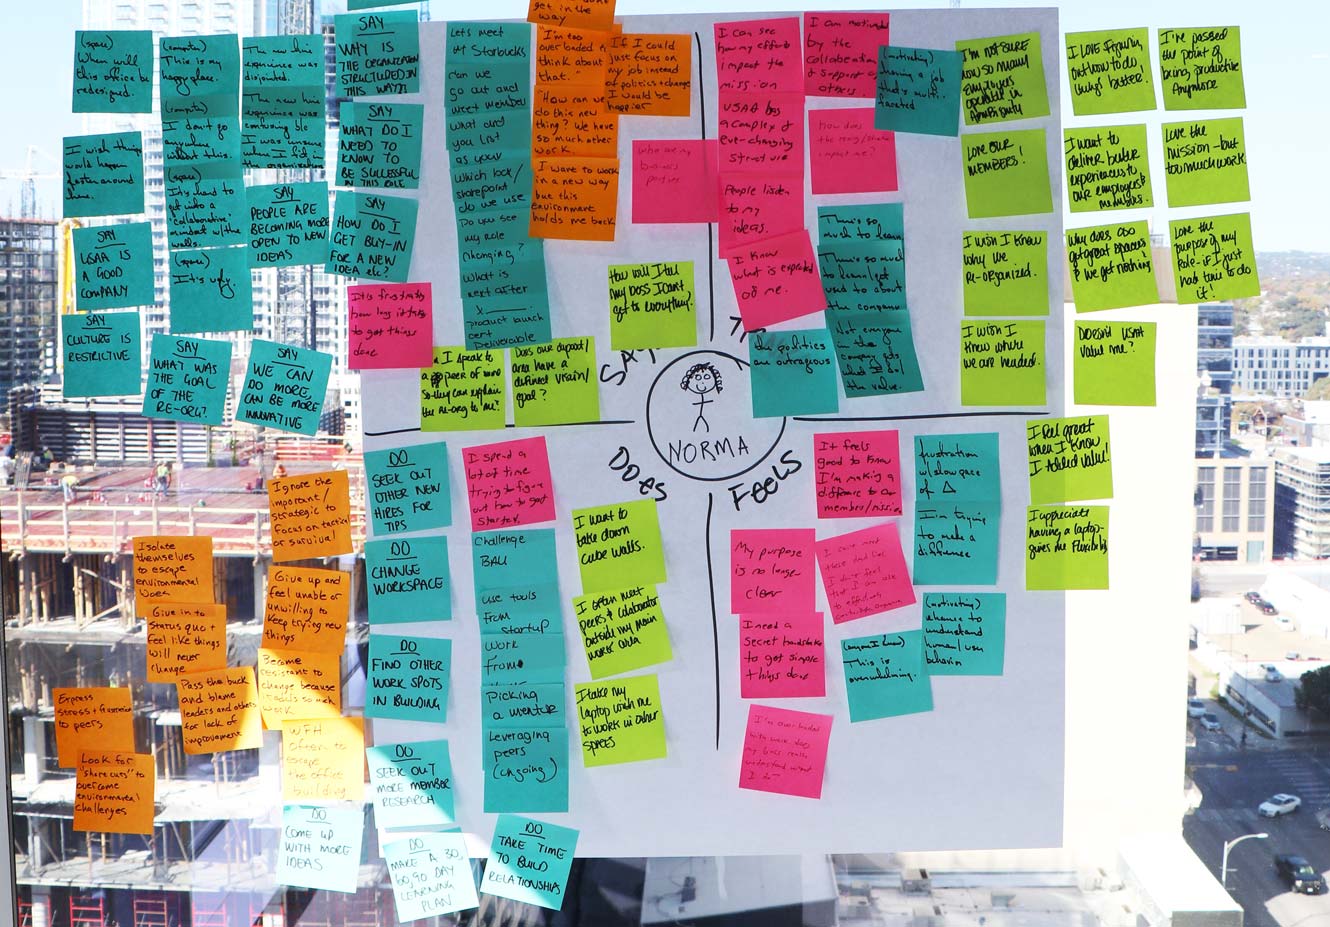
Divide a white board or large sheet of easel paper into four quadrants with a circle in the center. Label the quadrants: SAYS, DOES, THINKS, and FEELS.
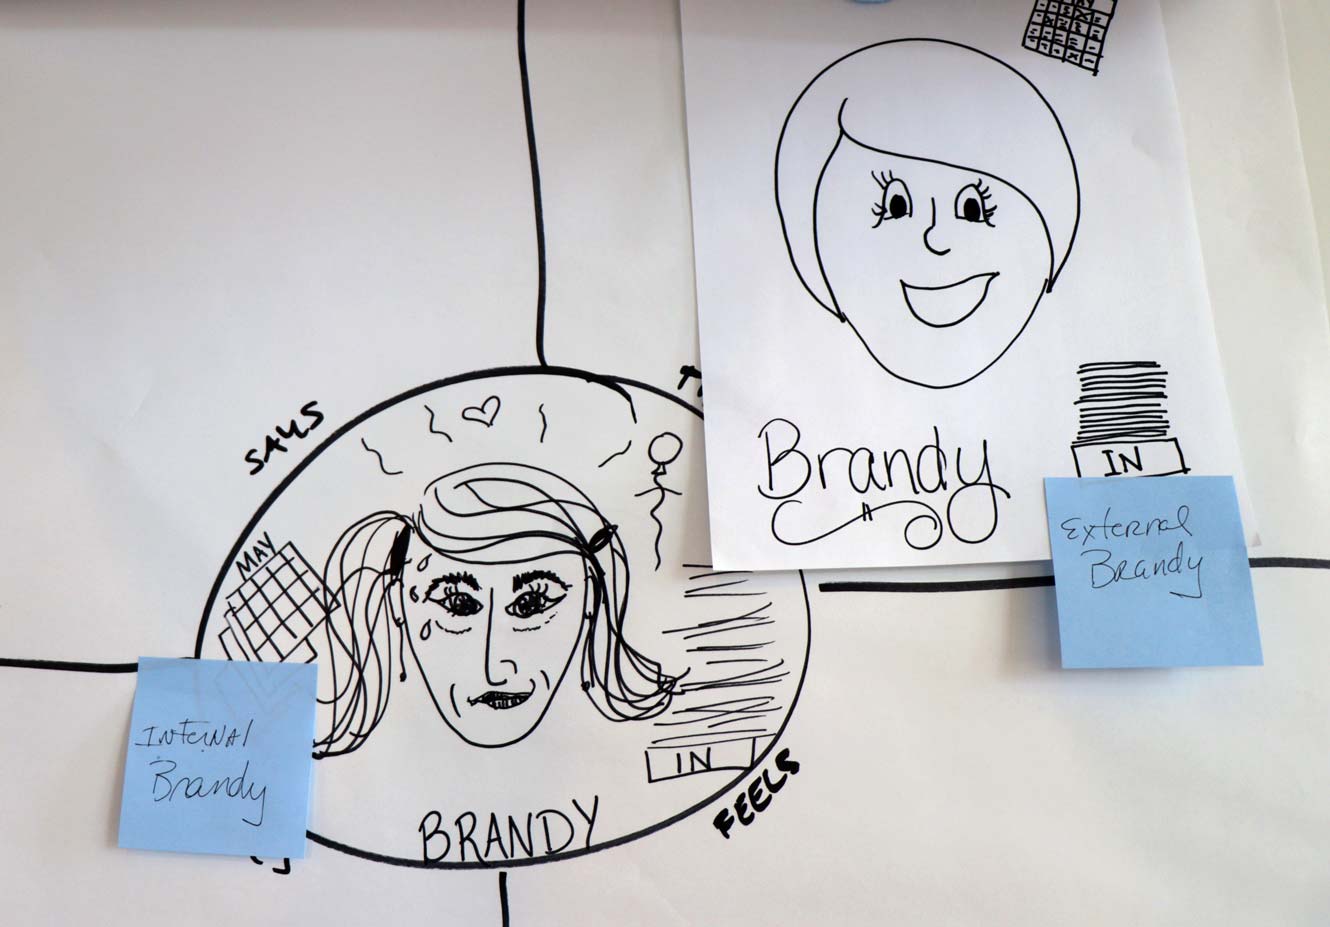
2 Draw a portrait.
Sketch a portrait of your member in the center circle. Name your member and add a short description of who they are and what they do. This portrait literally give a face to the needs of real people and help the team feel more connected to them.
3 Diverge on the observed.
Individually, the team should post stickies of what they heard members say or saw them do during research sessions. Write one quote or action per sticky and add them to the SAYS and DOES quadrants.
4 Diverge on the inferred.
Individually, the team should continue to add stickies of things they believe members would think or feel. This information is not directly observed during research so team members must make inferential leaps based on what they learned about members during research. Write one thought or feeling per sticky and add them to the THINKS and FEELS quadrants.
Watch Out
If you start to lose momentum, look at each sticky in SAYS and DOES and infer what you think the member is THINKING or FEELING in those moments.
5 Synthesize data.
Group the stickies based on inferred likeness; this may mean you move stickies around and out of their original quadrants. Wherever possible, your team should try to uncover underlying patterns based on member sentiment or motivation. Grouping based on inferred likeness tends to lead to richer connections from the qualitative data.
Watch Out
Avoid grouping by categories (which is our natural tendency).
6 Name emerging design opportunities.
Make inferences about the member needs based on these new groups. Review each group and ask, "Why does this group of stickies exist? What are the underlying needs of this member? Which of these needs can our team meet with our design?" Use these needs to inform intent of the product or experience moving forward. Capture each opportunity or need as a statement to guide your work. For each statement, use the template, "In order to be successful our solution must _________."
Bonus Points
Invite participants you met during research to your Empathy Map playback. Do your team's conclusions ring true to real members?
Next Steps
Revisit your Empathy Map throughout the life of your project. Have your target member's needs changed? Team-up with MM&I or sister design teams who have completed member research to see how your members are changing over time.